Castle Mountain Reflection 1

Castle Mountain Reflection 1

Posted on

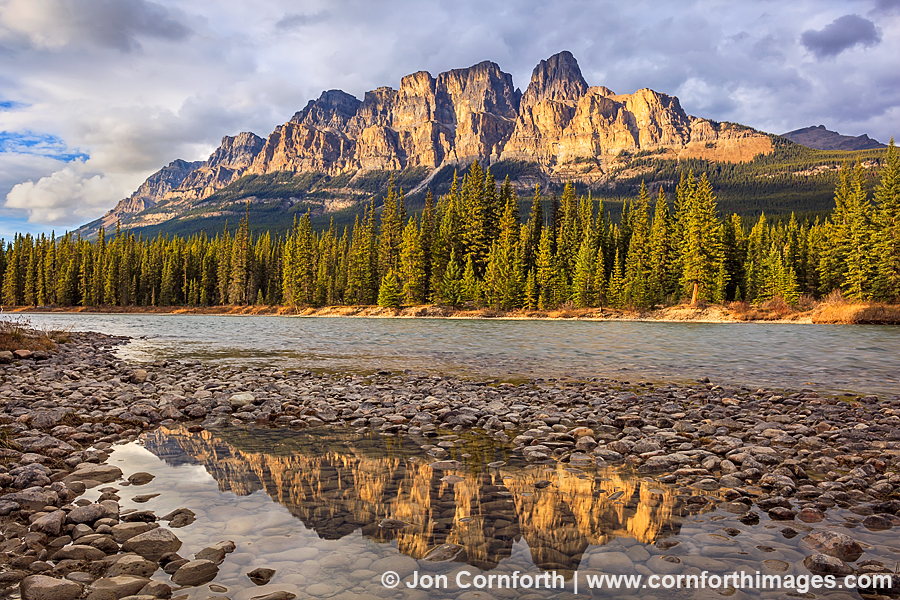
I created this dramatic image of Castle Mountain on the first night of my recent Banff National Park Photography Tour. Unlike many of the famous viewpoints in the US National Parks, we had this beautiful vista all to ourselves. This location is right next to the road, making this view from along the banks of the Bow River one of Banff’s most iconic landscape photos. Many landscape photographers seem to be over-infatuated with the orange-red light at sunset. I don’t blame them, but I often find my most successful images earlier during the golden hour before sunset or after sunrise. This image is a perfect example of this early sunlight still at a high enough angle above the horizon to illuminate the entire scene. Any later and the trees are all just dark silhouettes (which they were and I have pictures of). The ominous clouds above the mountain add drama and help focus the viewer’s attention onto the mountain in the middle of the scene. I created this image with my Canon 5DmkII, Carl Zeiss 28mm f2 ZE lens, Singh-Ray LB Warming polarizer, and 4-stop Soft Graduated Neutral Density filter. On a tripod, of course.

Sockeye Salmon 1

Sockeye Salmon 1

Posted on

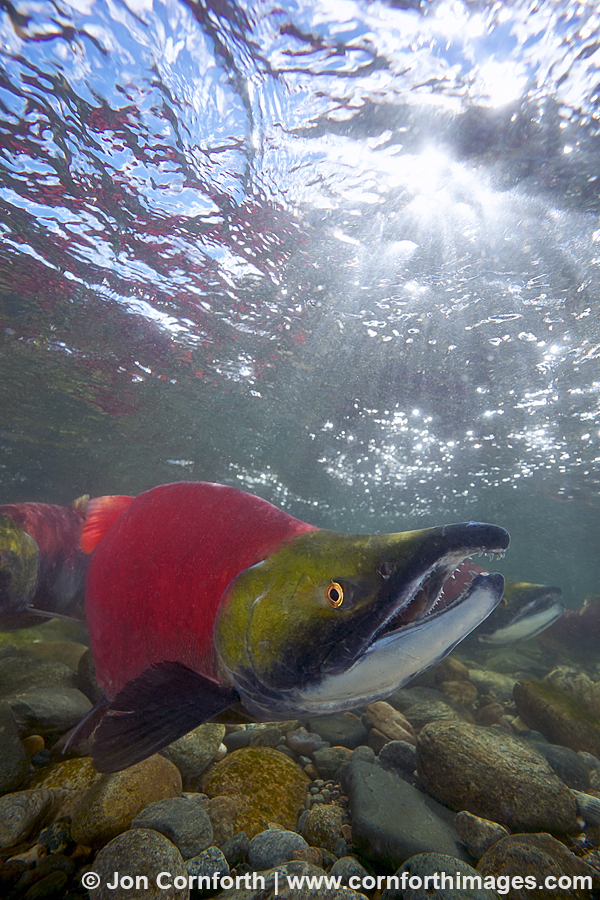
I spent last Thursday and Friday photographing the sockeye salmon migration on the Adams River in central British Columbia. It was a miraculous sight to behold! Every 4 years the salmon return in huge numbers. However, they had not returned in as great a numbers as this year since 1910. The relatively short life cycle of the salmon is amazing when you consider that when they are born they swim in Shuswap Lake for a year before descending the Fraser River, migrating to the North Pacific Ocean, and finally returning to the river of their birth by swimming past orcas, fisherman, and the city of Vancouver to lay their eggs before dying. Though the young salmon never meet their parents, the accumulated biomass of their decaying parents nourishes the lake and thus the young salmon in their first year of life. The epic journey of the salmon is a story about determination and rebirth.

During my previous visit to the Adams River in 2002, I was just beginning my photography career. I had no idea what I was doing with an underwater housing. Plus, I was limited to only 36 exposures on a roll of film, which made it a real pain getting out of the water to change film. Using my Canon 5DmkII and 17-40mm f4 lens in my Ikelite 5DmkII housing with an 8″ dome port and dual DS 160 strobes, I am now able to create over 600 exposures on my 16GB Sandisk Extreme cards. My recent shoot was no longer limited by technology, but more by my patience and willingness to sit on my knees in the middle of the river while wearing my drysuit for hours at a time. I perfected my technique of shooting “blindly” by positioning myself in the river so that an eddy formed downstream of my body where the salmon could congregate and then I lowered my housing into the water to fire away at 4fps without looking through the viewfinder. Clearly, there was a lot of room for error in my positioning of my camera in this manner, because I had to delete a lot of images. I was inspired to create this image as the sun was just starting to rise over the tops of the trees in the late morning. The salmon were backlit, so I used my strobes for a bit of fill-flash. I did not have all my correct strobe arm parts with me, so I attached one strobe to my housing in the vertical position on the left side and hand-held my other strobe against my knee with my right hand. I was able to push the shutter release button with my left hand while balancing my housing against the river bottom. My strobes were set to -3 and the rest of this image was just pure luck that I guessed correctly of how to angle my camera. I do not like to do very much post-processing, but I had to digitally remove a significant amount of backscatter that was caused by my strobes illuminating the particulates in the water. My overall point in this long description is that there was a lot of technical challenges as well as blind luck required to create this beautiful image.

Update on 10/23/10-For anyone who might be concerned about my photography interfering with the salmon, I had a permit from the Department of Fisheries and Oceans (DFO) that allowed me to be in the water.
Mazama Ridge Fall Colors 1

Mazama Ridge Fall Colors 1

Posted on

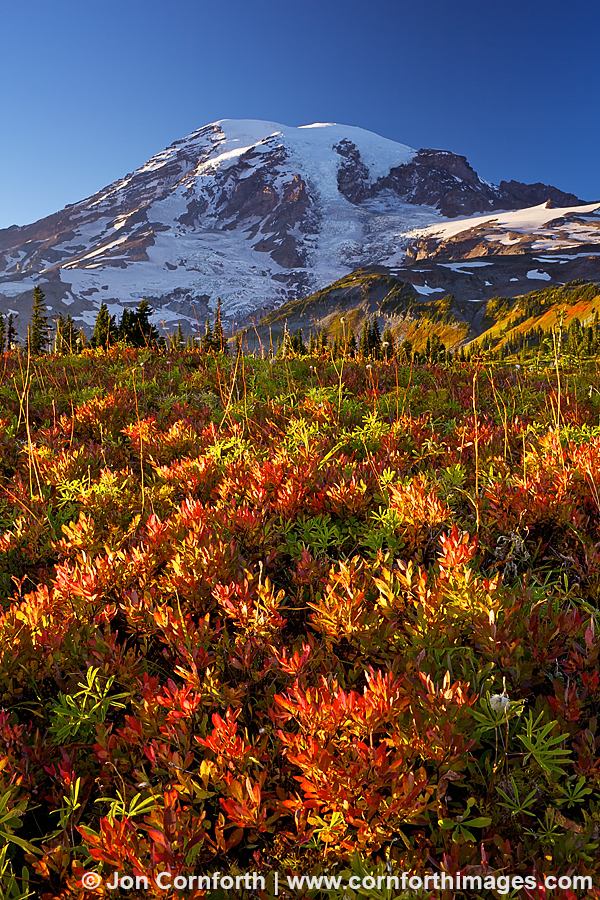
The most important thing I teach my photography tour clients is how to anticipate a shot. Let’s use my new image of the fall colors on Mazama Ridge as an example of when to shoot. When I was at Mount Rainier National Park last Friday, the sky was clear blue without a single cloud on the horizon. I knew that the best image in these conditions would be when the angle of the sunlight was a few degrees above the horizon and still yellow or orange in color. Experience has taught me where the sun would go down, but I confirmed my guess by using my SunSeeker app on my iPhone. I wanted to shoot this scene as the sunset light settled into the trees and danced across the foliage in front of my camera. The tree shadows added some mystery to an otherwise beautiful but non-dramatic scene. This light only lasted for about 30 seconds before the foliage went into complete shade. I used my Carl Zeiss 35mm f2 ZE lens along with my Singh-Ray LB Warming Polarizer and 2-stop Hard Graduated Neutral Density filter to create this image using only 1 exposure which required minimal processing.

Picture Lake Fall Reflection 1

Picture Lake Fall Reflection 1

Posted on

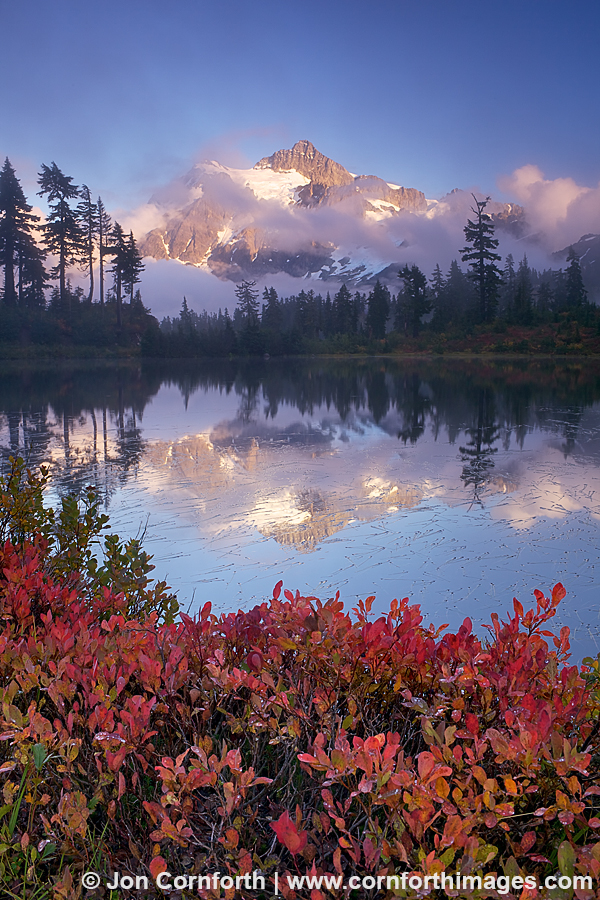
Last week, I helped 2 photography clients from Mexico City experience and shoot Washington’s fall colors. With all of my travels out of state, I no longer have as much time to shoot when I am home, so it was nice to do some photography in my old stomping grounds in the Cascades. For some reason, every time that I have been out shooting in the last month, I have experienced clear blue skies which has made dramatic light conditions very difficult to find.Of course, there are worse things than driving around in the mountains on sunny days. On the first day of our time together, precipitation clung to the North Cascades as I drove up I-5 to Picture Lake. I thought that our timing would be ideal for photographing fall colors and was not disappointed. As the clouds swirled and briefly parted late in the afternoon, my clients and I were able to photograph Mt Shuksan’s perfect reflection. The sun sets behind a mountain ridge at about 4:30, causing the foreground and trees on the opposite side of the lake to usually become too dark, but on this afternoon the lifting fog helped to soften the harsh shadows. I used my Singh-Ray LB Warming Polarizer slightly backed off from full polarization along with my Singh-Ray 4-stop Soft Graduated Neutral Density filter placed above the foreground foliage to balance the exposure. I also chose to photograph this scene with my Carl Zeiss 35mm f2 ZE lens in order to keep Mt Shuksan from becoming too small in the overall composition while still being able to have enough depth of field at f16 to include the foliage along the shore in the foreground.

Smith Glacier Crevasse 1

Smith Glacier Crevasse 1

Posted on

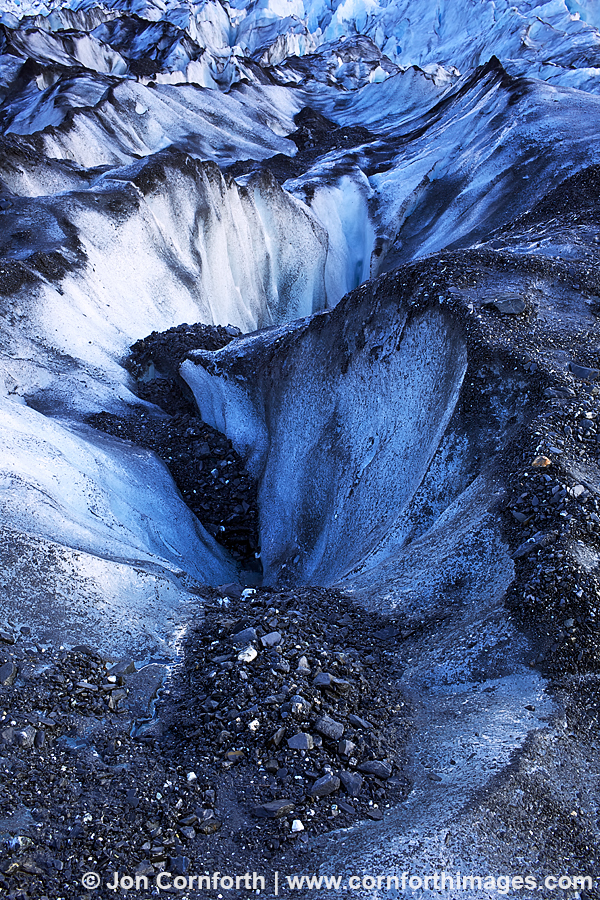
I created this image during my first incredible but brief voyage on Prince William Sound in Alaska last month. I motored my boat from Whittier to the head of College Fjord for a few days and was blown away but the photographic potential. I anchored in Tuition Cove near the Yale Glacier and used my inflatable to explore the area. One morning, I navigated my way through the iceberg choked fjord to the the Smith Glacier with the ambition of photographing the Harvard Glacier at sunrise. I got skunked on that one, but I was thoroughly enamored with the area so I turned my attention to the intimate landscape details of these crevasses.

Mt McKinley & Mt Foraker Sunset Aerial 1

Mt McKinley & Mt Foraker Sunset Aerial 1

Posted on

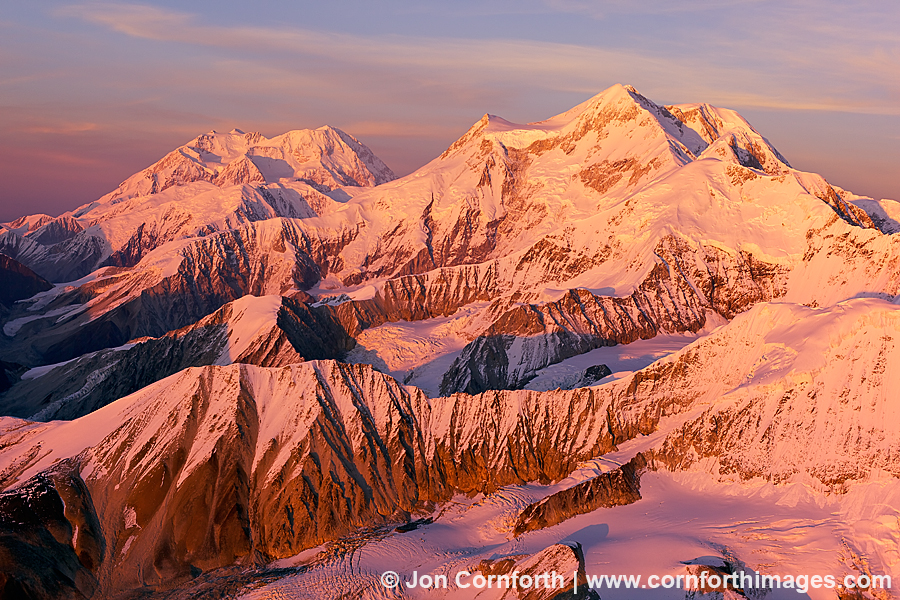
During my recent Alaska trip, I was able to see Mt McKinley almost everyday due to the perfect clear weather. To see the mountain even 1 day is very rare, let alone for 10 days straight. My normal landscape images from the ground were just not very exciting, so I hired a small plane 3 times with various friends in order to fly over the Alaska Range at sunset and sunrise. I did not get the sunset image that I was after on my first flight, but I figured out exactly where I wanted to return to shoot on my second flight. I liked this location because I was slightly back from Mt McKinley (left) and Mt Foraker (right) and able to line them up with these repetitive ridges giving the image some depth rather than just a simple mountain portrait.

I created this image while hand-holding my Canon 5DmkII and Carl Zeiss 50mm f1.4 ZE lens with the airplane’s window open so that I could shoot without the glass obstructing my view. My camera body shoots 4fps. If I hold down the shutter release button I get about 12 images before I fill-up the camera’s memory buffer. With my Sandisk 16GB Extreme CF memory cards, I can photograph almost 600 images before my card is full. That comes out to only 2.5 minutes of actual shooting before I fill-up the card! Over the course of almost 3 hours of flying that is a minimal amount of time. There is a lot of teamwork and communication involved between me and the pilot in order for me to create an aerial image like this. Of course, when I am back home I then have to edit 3000 images of the exact same thing looking for minor variations to find the image with which I am happiest.

Denali Highway Aurora 1

Denali Highway Aurora 1

Posted on

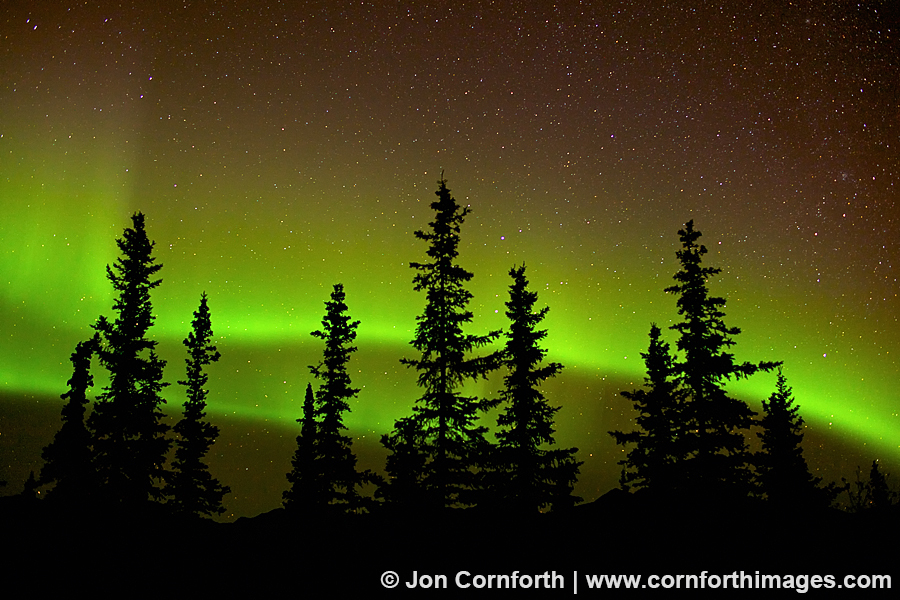
I just returned from almost 2 weeks in Alaska and had fabulous weather the entire trip. In fact, it was so nice that shooting conditions were less than ideal because there were no clouds in the sky for landscape or wildlife photography. The few times that there were sunrise/sunset clouds were on the days that I was driving long distances and did not have time to shoot. Fortunately, I made the most of what was available to me and that included photographing a beautiful appearance of the aurora borealis. Some friends of mine in Talkeetna told me the northern lights were out very late one night while I was sleeping, so I checked the aurora forecast the next day on spaceweather.com and decided to stay up that night to shoot. Though I was getting over a cold and exhausted from lousy travel sleep, I drove up the Denali Highway and stayed up until 3 am. Fortunately, the lights made an appearance and were at their best around 1 am. I set my camera on ISO 1600 and used my Carl Zeiss 35mm f2 lens set at f2.8 and 12 seconds to record this image. The aurora was more interesting off to the left of the frame, but I really liked these trees to make the entire composition, rather than just an aurora picture of the sky.

South Sawyer Glacier Harbor Seal 2

South Sawyer Glacier Harbor Seal 2

Posted on

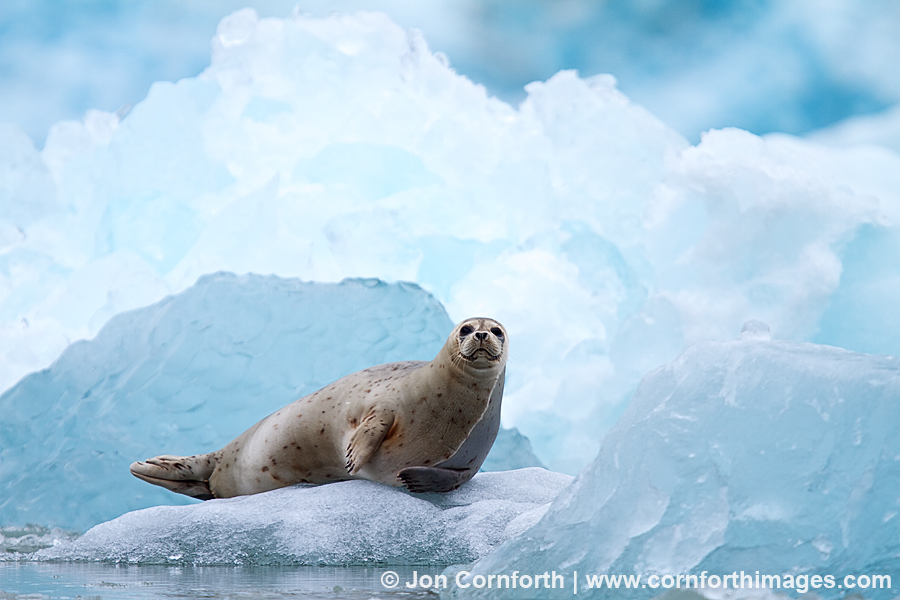
Over the Labor Day weekend, I wrote an article for one of the big photography magazines about how to photograph Alaska’s wildlife. It is scheduled to be published in the upcoming January issue. I want to share an excerpt from the article and a new harbor seal image that I created in Tracy Arm in July. I hope that you look forward to the complete article, but for now, please enjoy this teaser:

Most of the tidewater glaciers in Alaska support communities of harbor seals resting on icebergs, but it is difficult to approach these skittish animals. My best photo opportunities have happened by drifting amongst the icebergs in my inflatable in order to quietly observe the seals.  You will need to have a long lens in order to get in tight. I own the Canon 400mm f4 DO IS lens, which when combined with my 7D becomes a very hand-holdable 640mm equivalent. I prefer my images to be as close to eye-level at the water as possible, so try to get down to the lowest part of the boat. It looks much more intimate from a low angle than when shot down on them from up high. If you are unable to get in close enough for a frame filling shot, look for complimentary iceberg patterns around a seal in order to show it in its environment. Also, remember to over-expose your image at least +1 stop when you are photographing bright subjects like icebergs!

Humpback Whale Tail 101

Humpback Whale Tail 101

Posted on

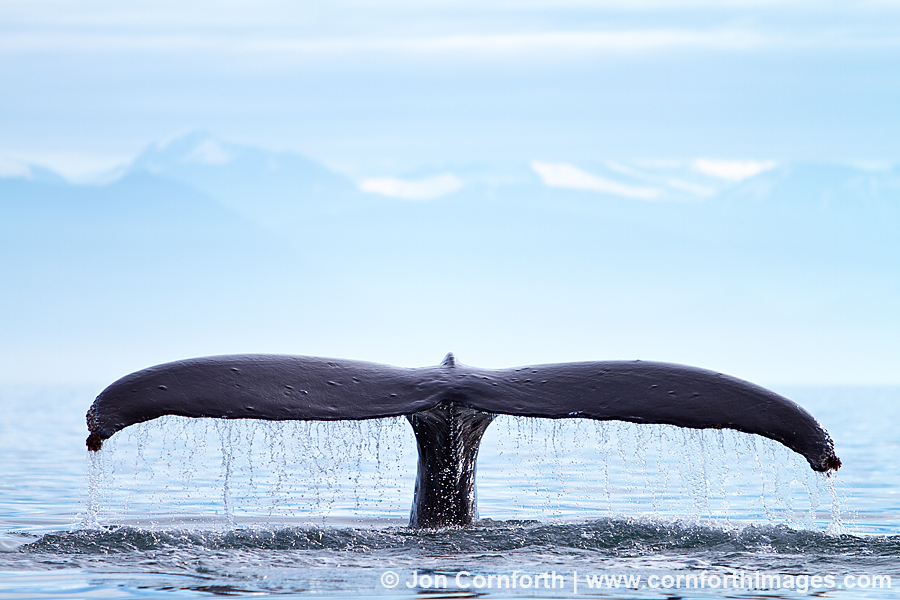
For marine mammal photographers like myself, photographing whale tails is not that hard to do, but creating a striking image is. This is the only part of the animal that most whale watchers will ever see. It’s not the most dramatic behavior, and certainly nowhere near as photogenic as a full body breach. Over the years, I have taken tens of thousands of whale tail images. I am grateful that I no longer have to spend money on film since most of these images are utterly useless and unworthy of even the 1 second of my time that it takes for me to hit the delete button. Still, every once in a while I photograph a nice tail, like this one. Here’s how the sequence of events needs to work in order to create an image like this. A whale has to surface within a few hundred yards of my boat. It will normally take 3-5 breaths on the surface before diving, which might give me enough time to close the distance on the tail and take up a position behind the whale, not slightly to the left or right, but directly behind it. When the whale begins its dive, there is usually 1 image where the tail is almost at its apex and water is pouring off of it. I am also ever vigilant for a pleasing background, like these snow capped peaks and non-distracting blue mountains in the distance. The entire image has to come together, not just any one part. You can also see other whale photos when you visit my whale photo galleries.

Humpback Whale Breach 108

Humpback Whale Breach 108

Posted on

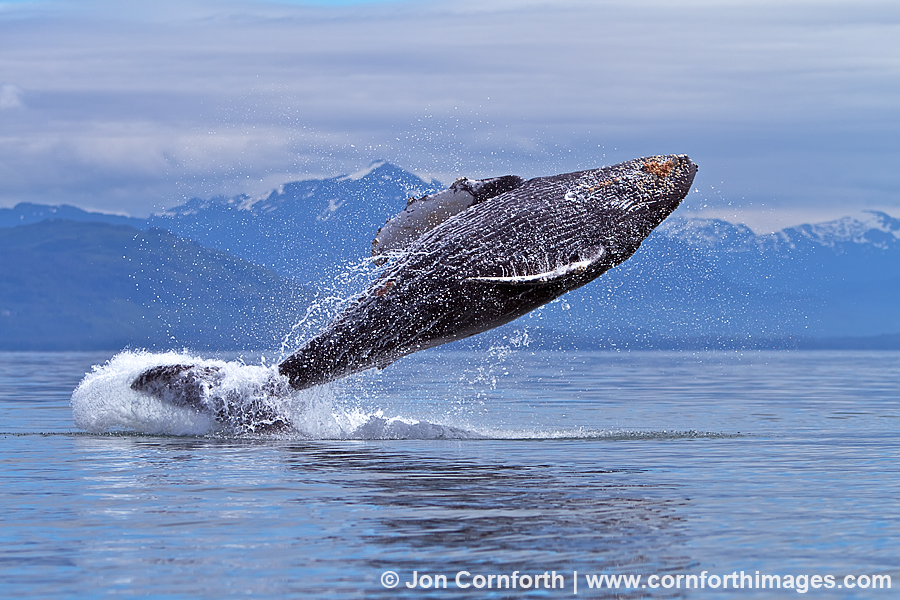
Another freakin’ humpback whale breaching photo? Well, yes, it is! I normally prefer breaching images at the peak of the whale’s trajectory, because they don’t appear as powerful in the limp-coming back down phase, let alone when the big splash happens. However, what I do like about this image is that it shows the power of the whale’s tail propelling it almost completely out of the water. You can see that there is very little of the whale still connected to the surface. I had to keep moving my inflatable for safety, but I also wanted to keep the whale on the inside of me in order to photograph it against the pretty blue mountains in the distance. See more photos of humpback whales.